Set-up instructions
Connecting the service to Kanta PHR
With the help of Sensotrend's services, your information is stored on your account in the Kanta PHR and visualized in a way that supports your self-care. A pdf version of the instructions can be found here.
 These instructions will help you set up a service package that you only need to do once.
🙋❔
Start by connecting the Sensotrend service to the Kanta PHR.
Go to https://www.sensotrend.fi/connect (1). Start setting up the service with the “Let’s continue!” button (2), after which the login page of our service will open for you. At this point, you can log in with your already existing Sensotrend account with the “Log in!” button (3) or register as a new user with the “Register!” button (4).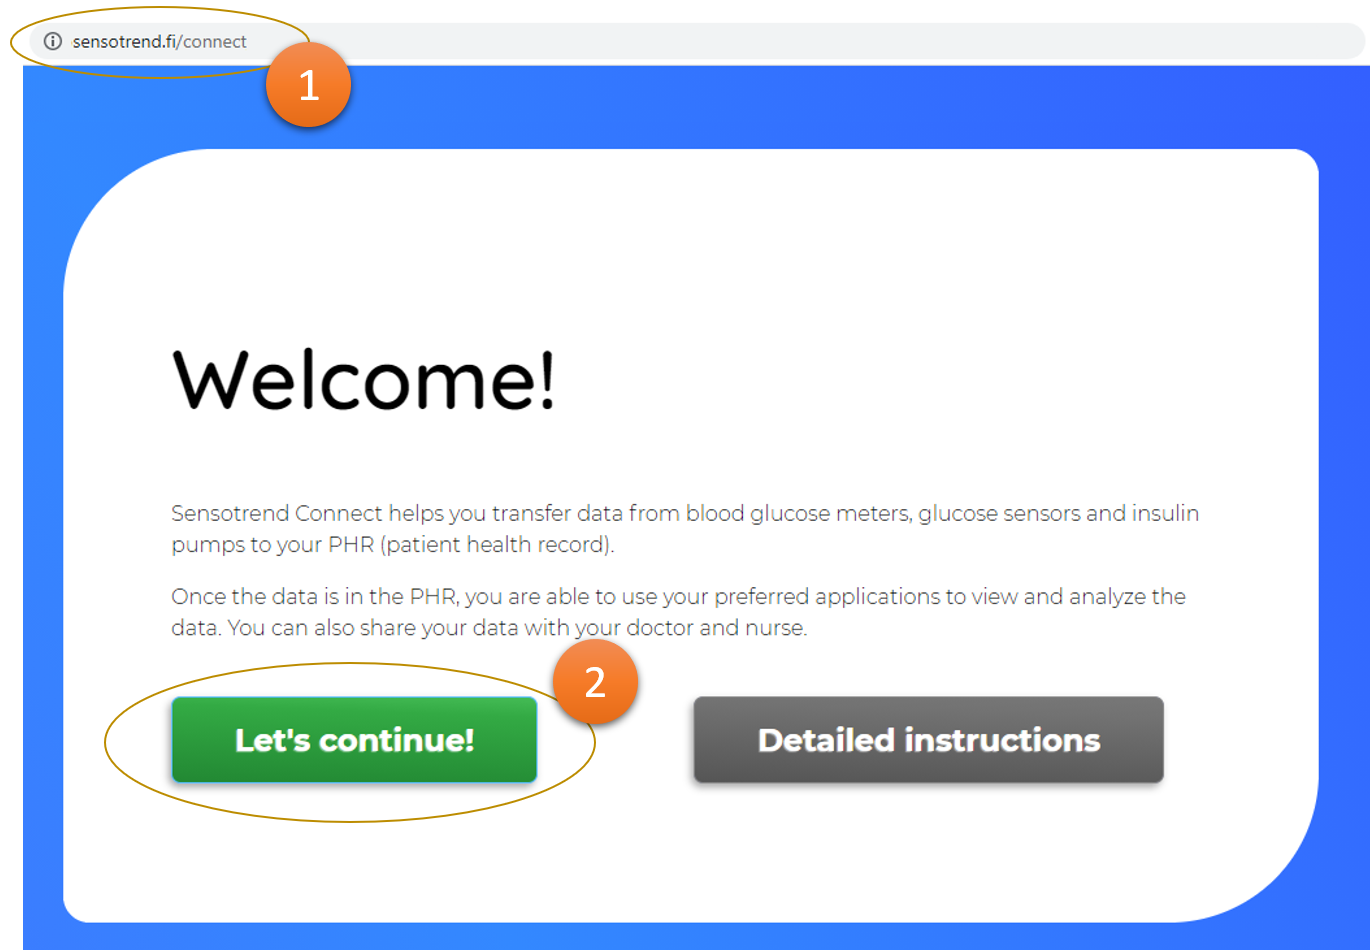
🙋❔
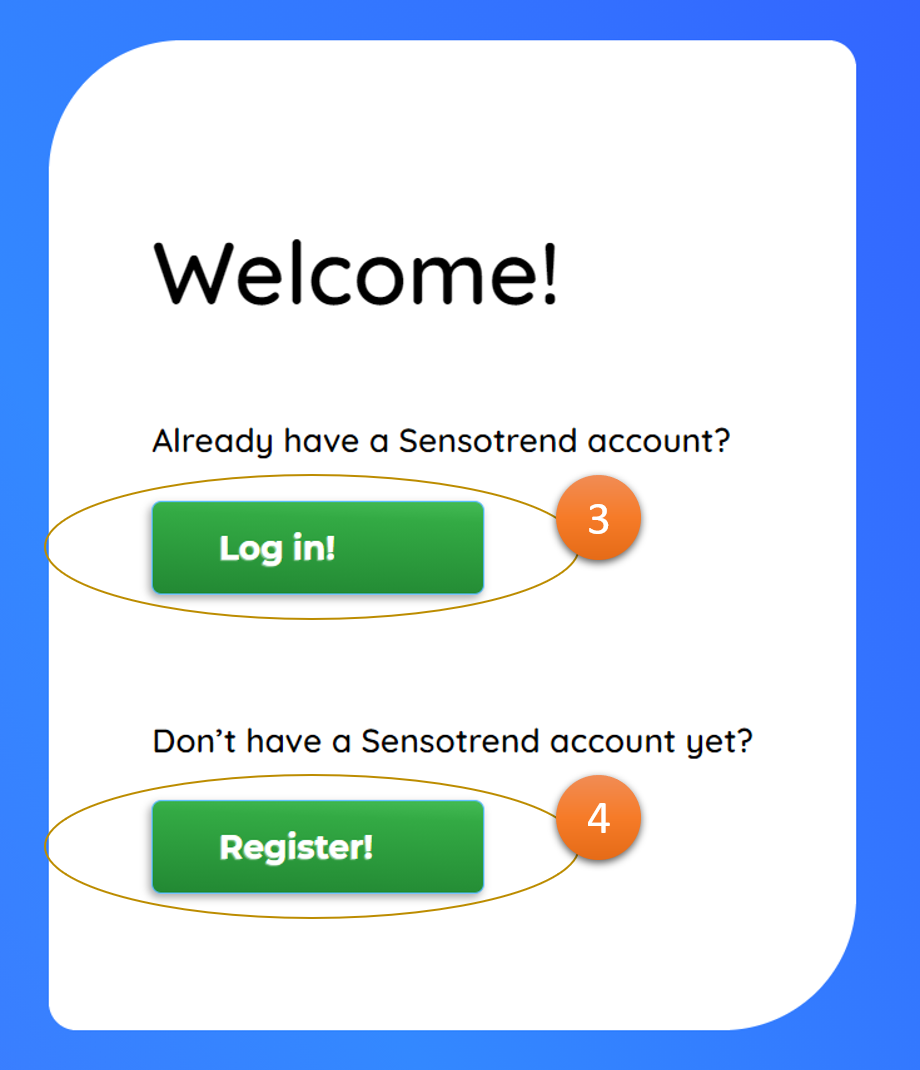
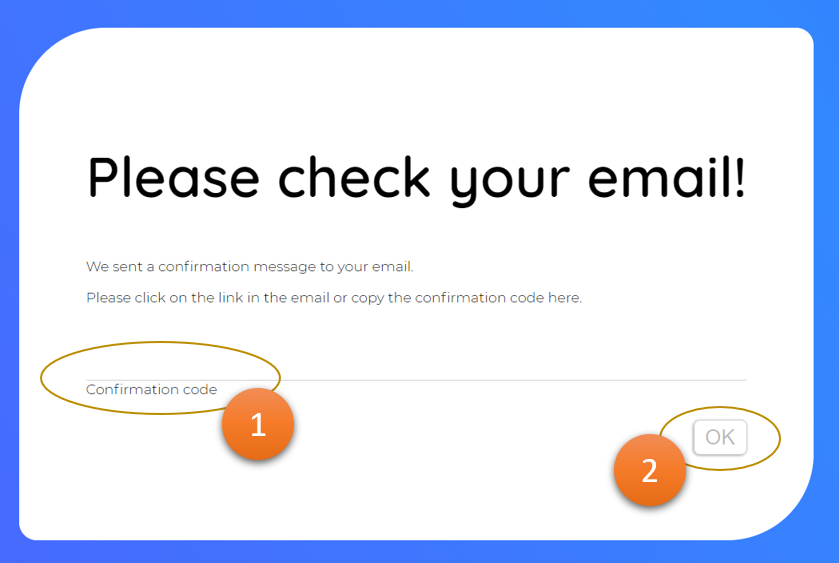
If you selected “Log in!” in step 1
, you will be redirected to the login page. You can log in with your Sensotrend account by entering your email address and password (1) and then pressing the “OK” button (2).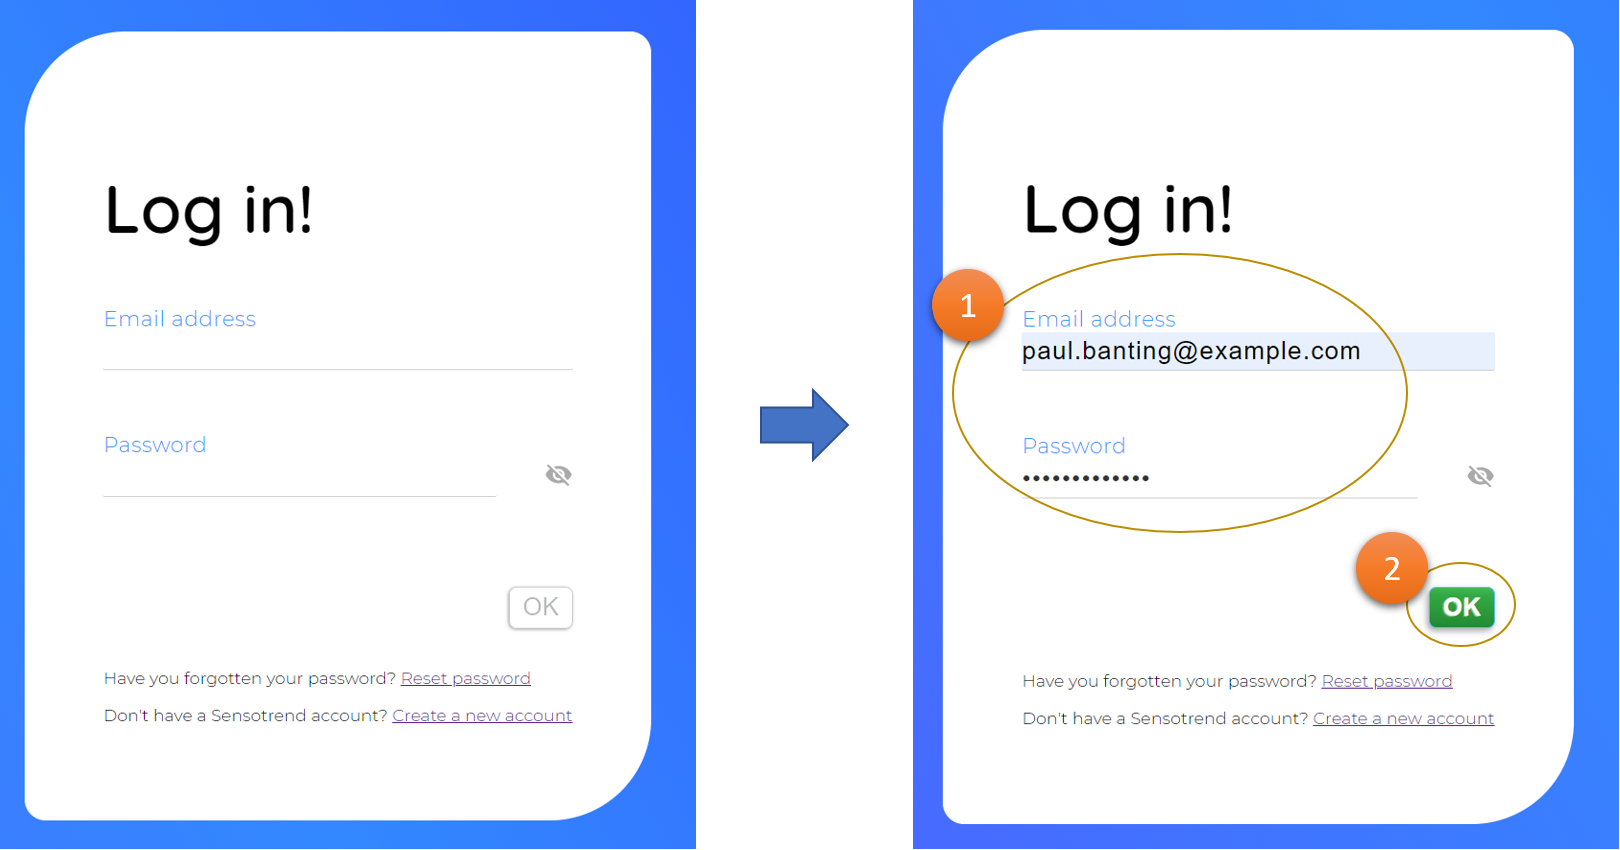
🙋❔
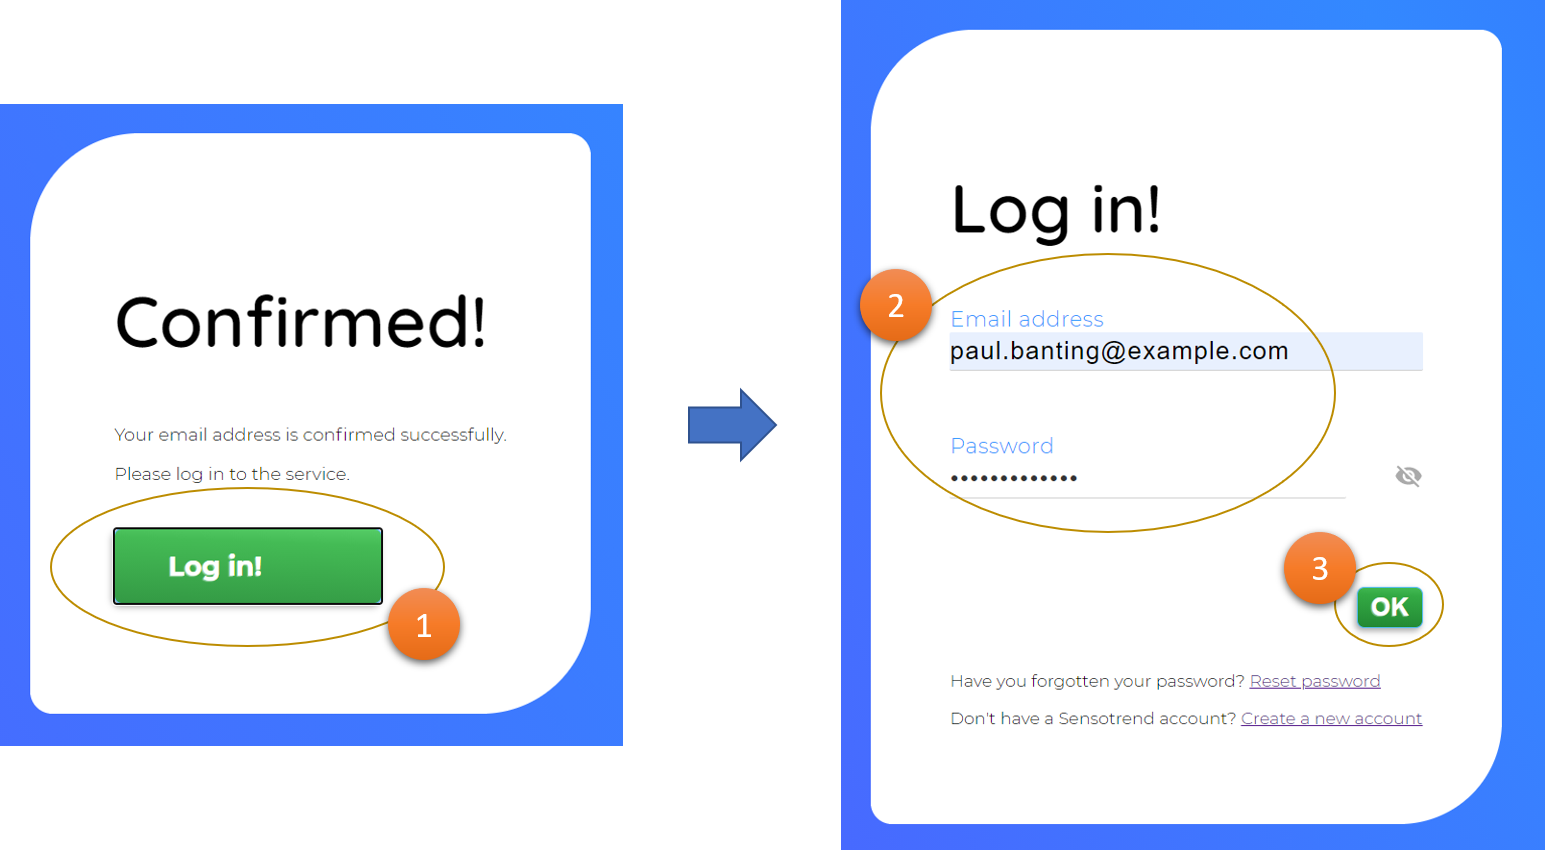
If you selected “Register!” in step 1
, you will be redirected to the registration page. Enter your name, e-mail address and choose a password for yourself (1). Create a new password for this username. Do not use a password that you use to log in to other services. Then press the “OK” button (2). You will receive a confirmation email in your email.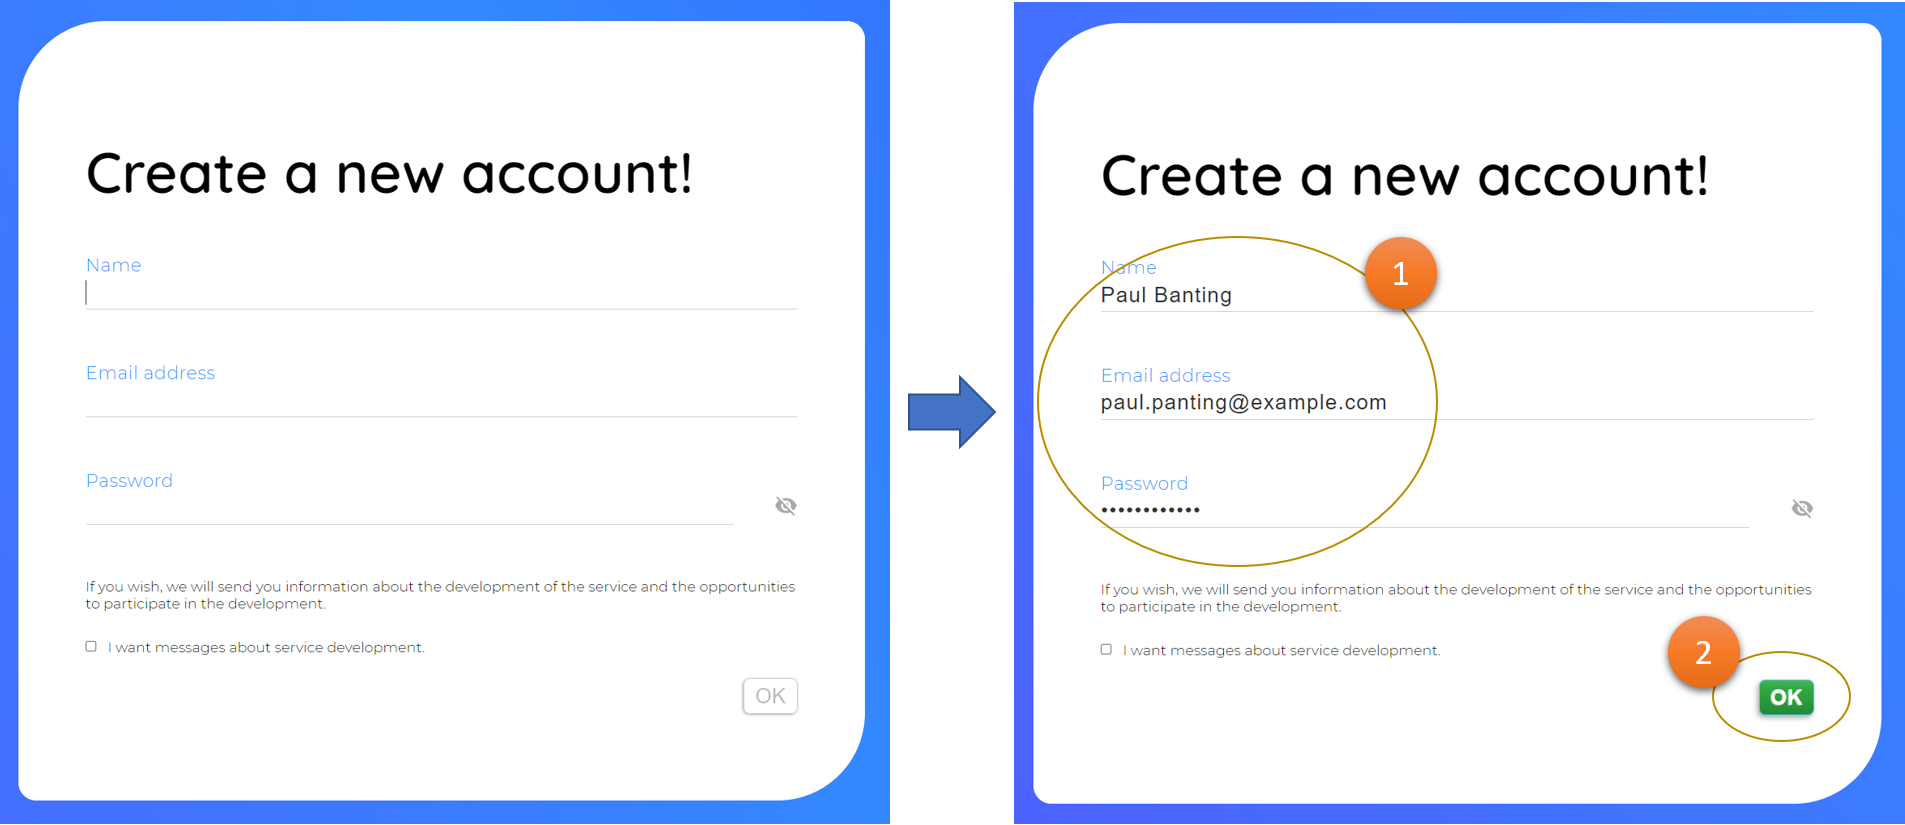
🙋❔
Next, you will be directed to My Kanta authentication so that you can connect the service to Kanta PHR.
Now press “Navigate to My Kanta!” button (1).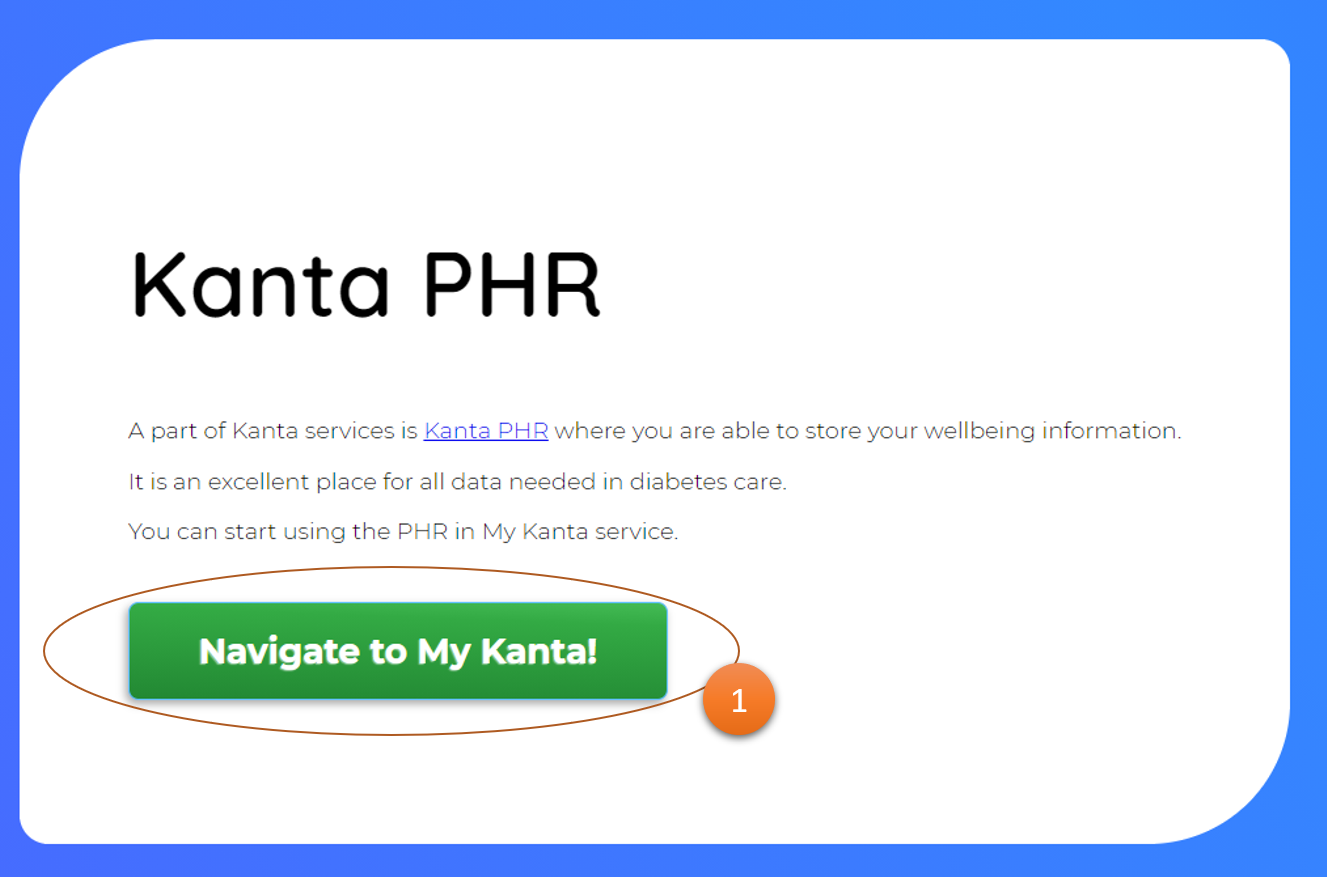
🙋❔
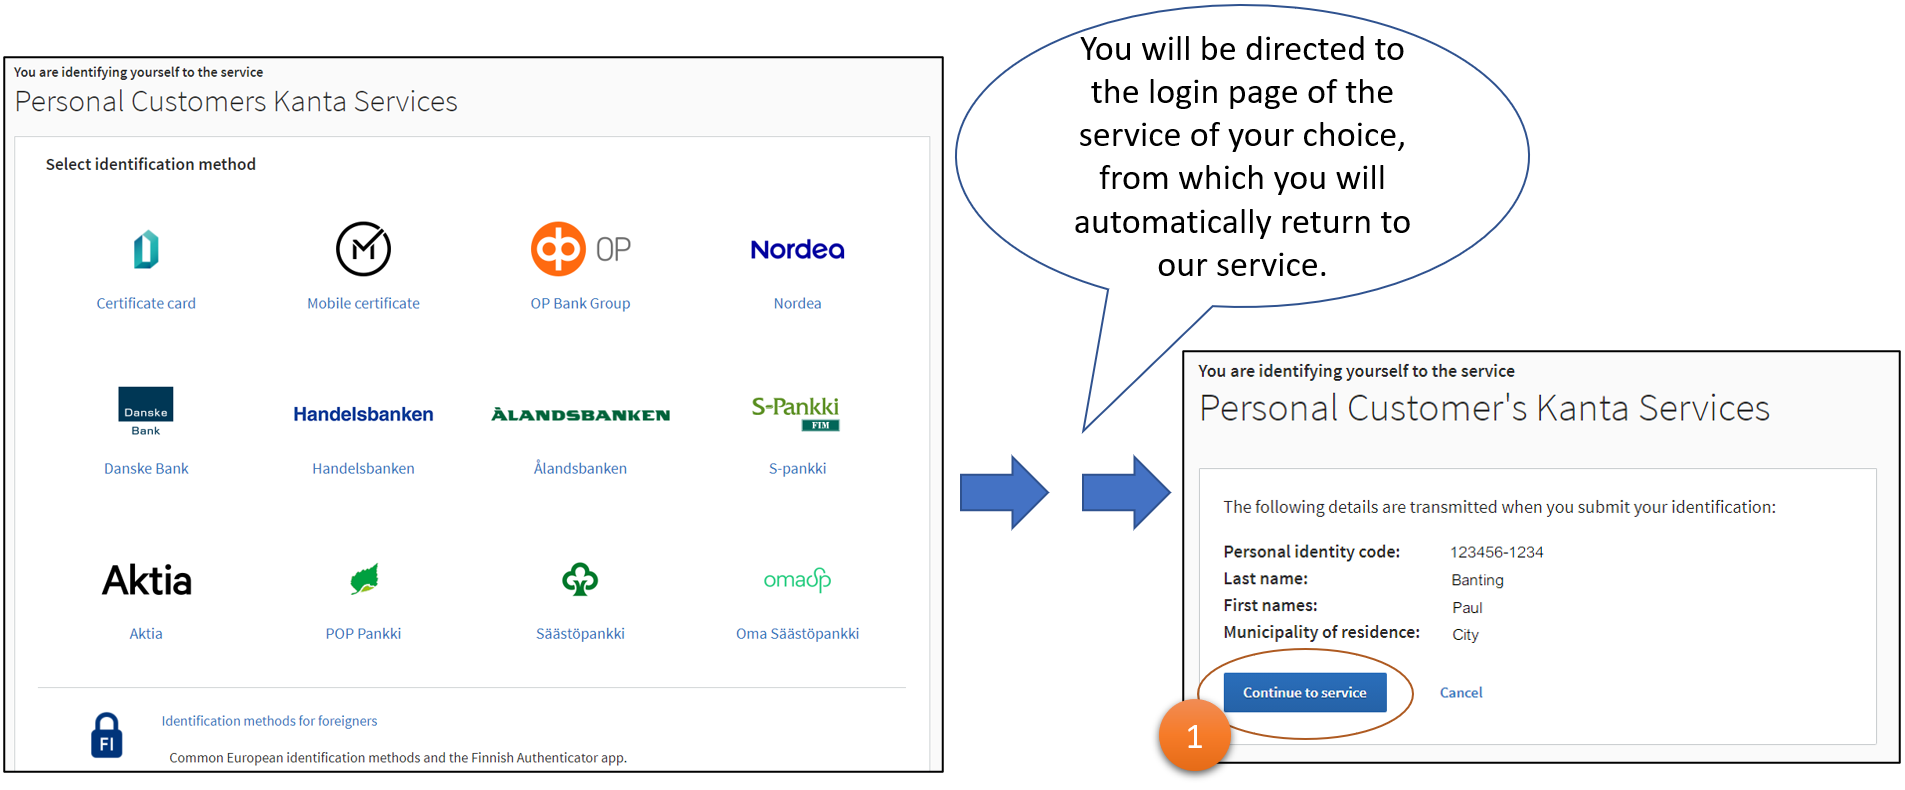
If this is the first application you connect to Kanta PHR,
the service asks you to accept the terms of use of Kanta PHR. Accept the terms of use, after which the service will automatically proceed to accept the access rights to Sensotrend's services.Kanta PHR will now ask you to accept the licenses for Sensotrend Connect. Press the “Authorize” button (1).
 The first phase is now complete.
Next, you need apps for data transfer and viewing.