User Instructions
Sensotrend Uploader - Abbott Precision Xtra
 Here are instructions for you to upload the data from Abbott Precision Xtra glucometer to the PHR!
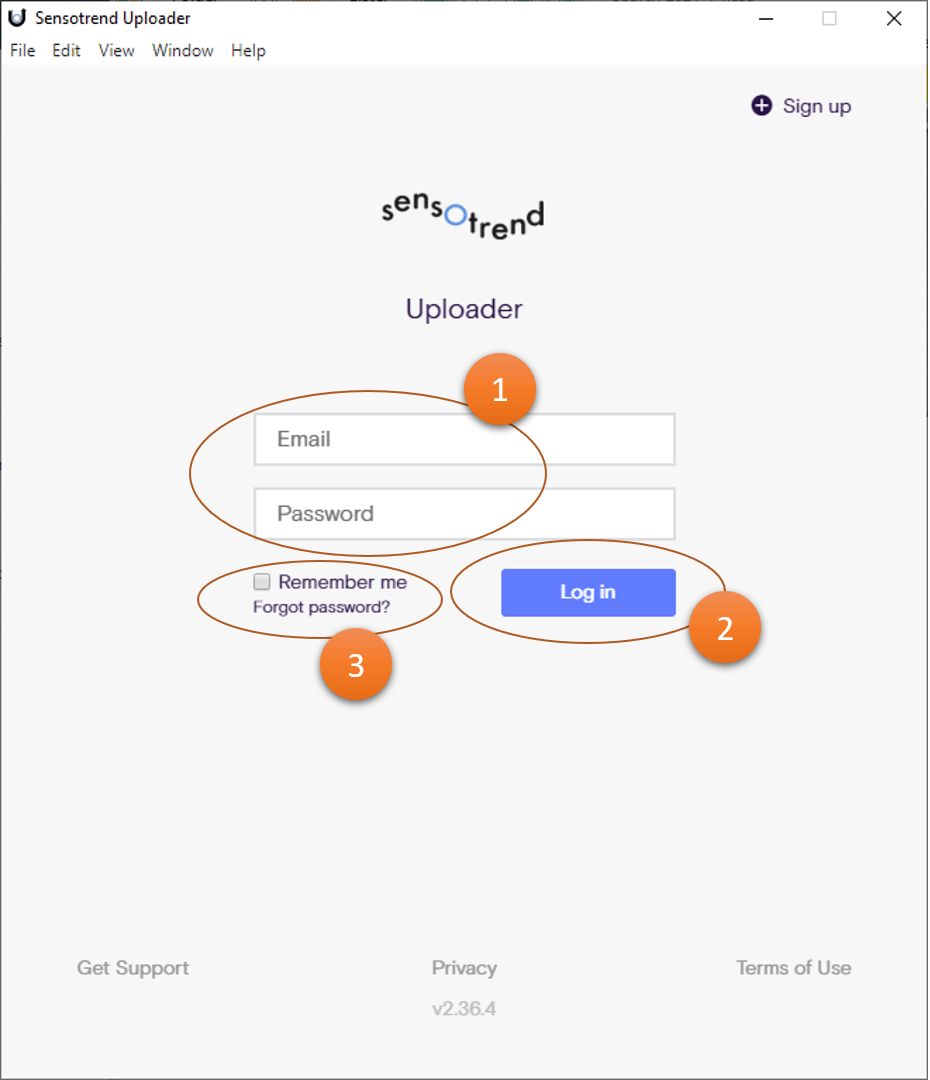
When launched, the Sensotrend Uploader will open a login page for you if you are not already logged in to our service.
Enter the email address that serves as your username and the password for Sensotrend services (1) and then press the “Log in” button (2). If you select “Remember me” (3) on this page, you will be logged in automatically in the future.
On first use, the Sensotrend Uploader will ask you to select the devices you are using.
Select "Abbott Precision Xtra" from the list (1) and press the “Done” button (2).

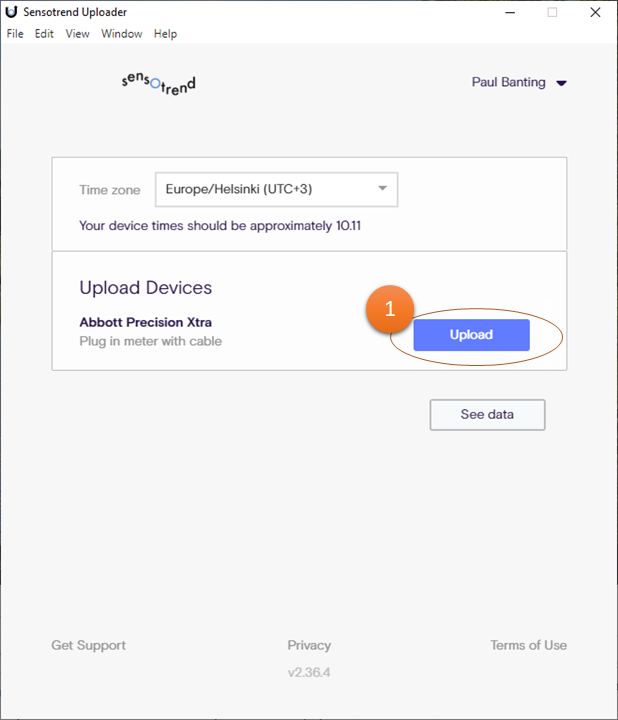
The Sensotrend Uploader application window should look like this.
To upload your data, connect your glucometer to your computer with your device's own USB cable. Wait until “] - PC” appears on the blood glucose meter display, then press the “Upload” button (1).
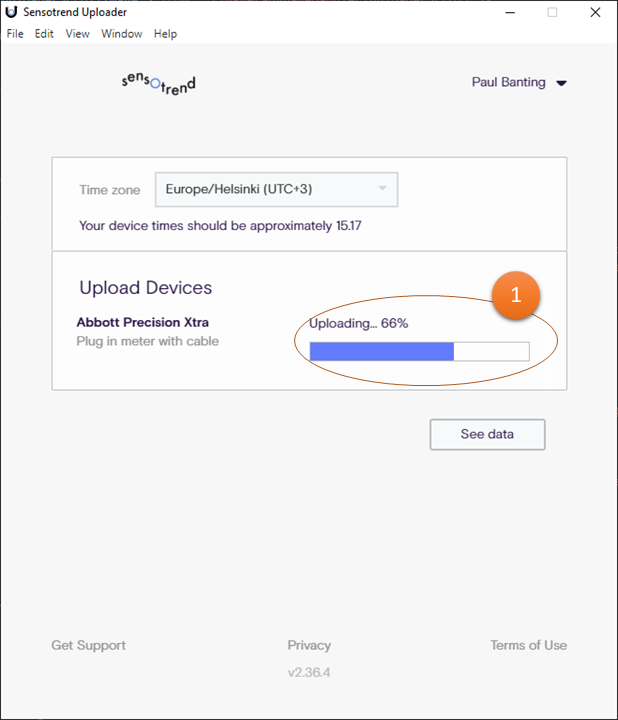
After starting the data transfer, the “Upload” button will be replaced by a message (1) indicating the progress of the data transfer.
When the upload is complete, the Sensotrend Uploader application window will look like this.
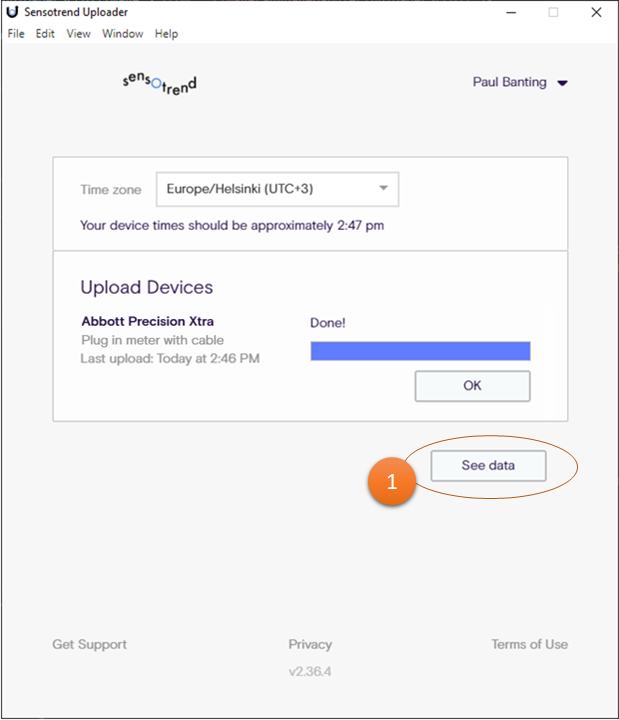
The data has now been uploaded successfully. Transferring a large amount of data takes a while, so in some cases the data sent to it will not appear for half an hour. Once the data has been transferred, you can view it by clicking the “See data” button (1).
The data has now been successfully uploaded! You can view them with Sensotrend Dashboard application or directly from the user interface in the PHR.
Instructions and tips for viewing and utilizing your information with Sensotrend Dashboard application can be found from this instruction.
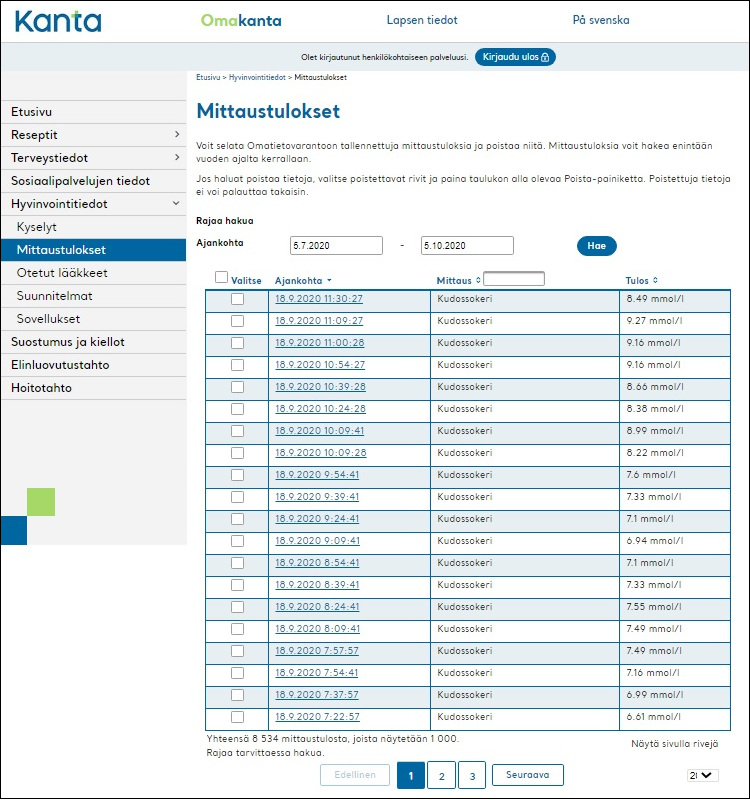
You can also view your information in the Kanta PHR, as individual data points.
To do so, log in at https://kanta.fi .